
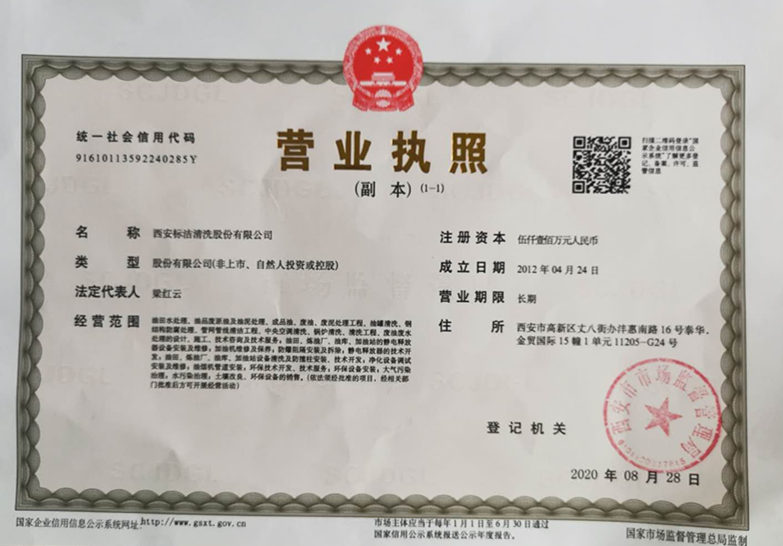
������ע���ʽ�5000��
���İ������ѹ��Ƴɹ���ҵ


��������ҵ12�꣬רע������ʽ����ϴ����ʽ����ϴ��������ϴ�����ܵ���ϴ��
����Χ�㣬���������ͻ��IJ��컯����

Boiler cleaning
Boiler cleaning
Boiler cleaning
Boiler cleaning
Boiler cleaning
Boiler cleaning
Boiler cleaning
Boiler cleaning
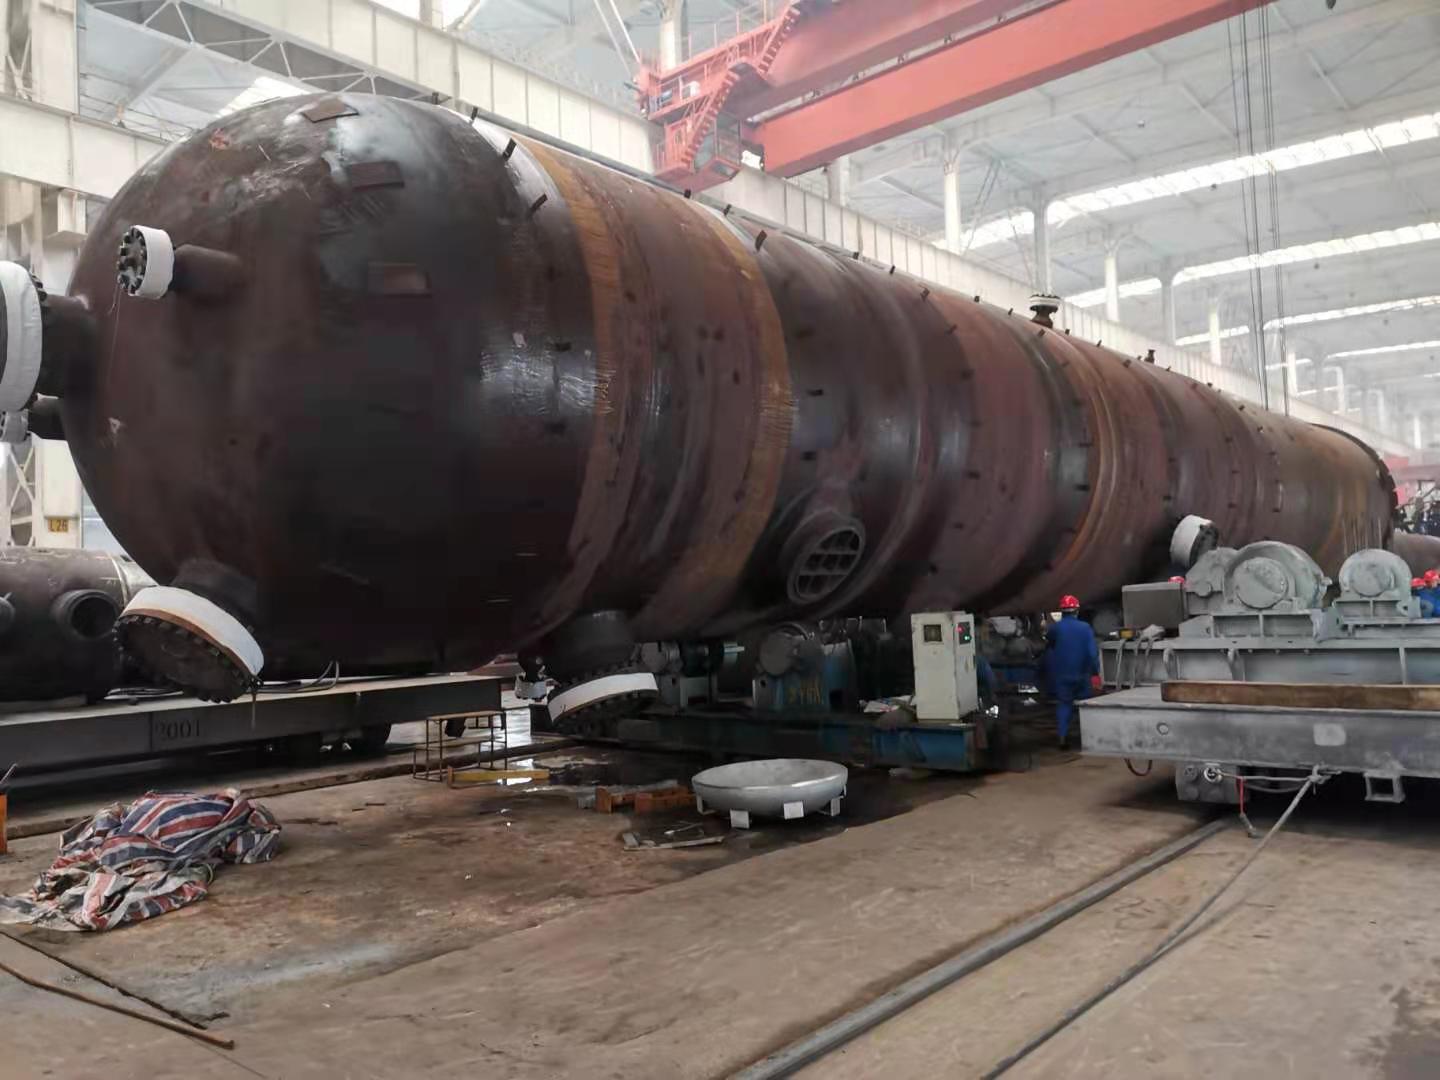
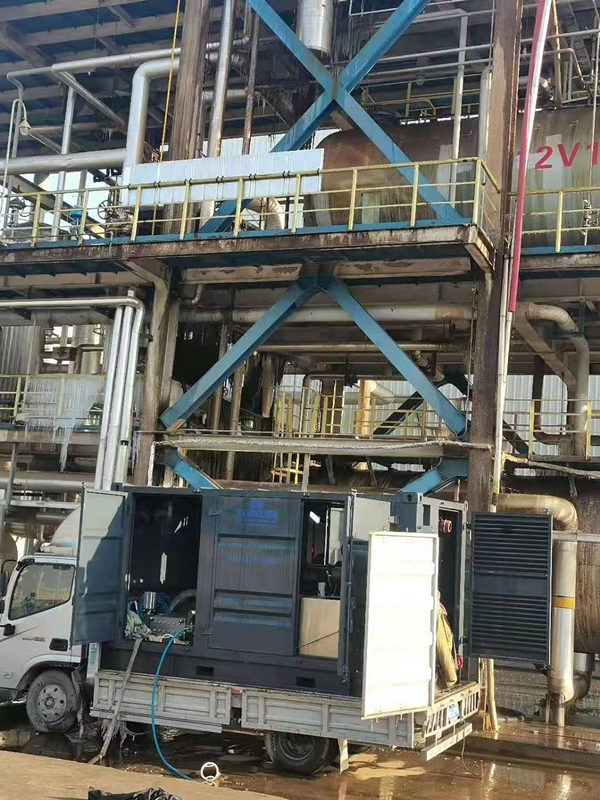
���ӵ�и�ѹ��ϴ����ѹ������¯��ϴ�豸
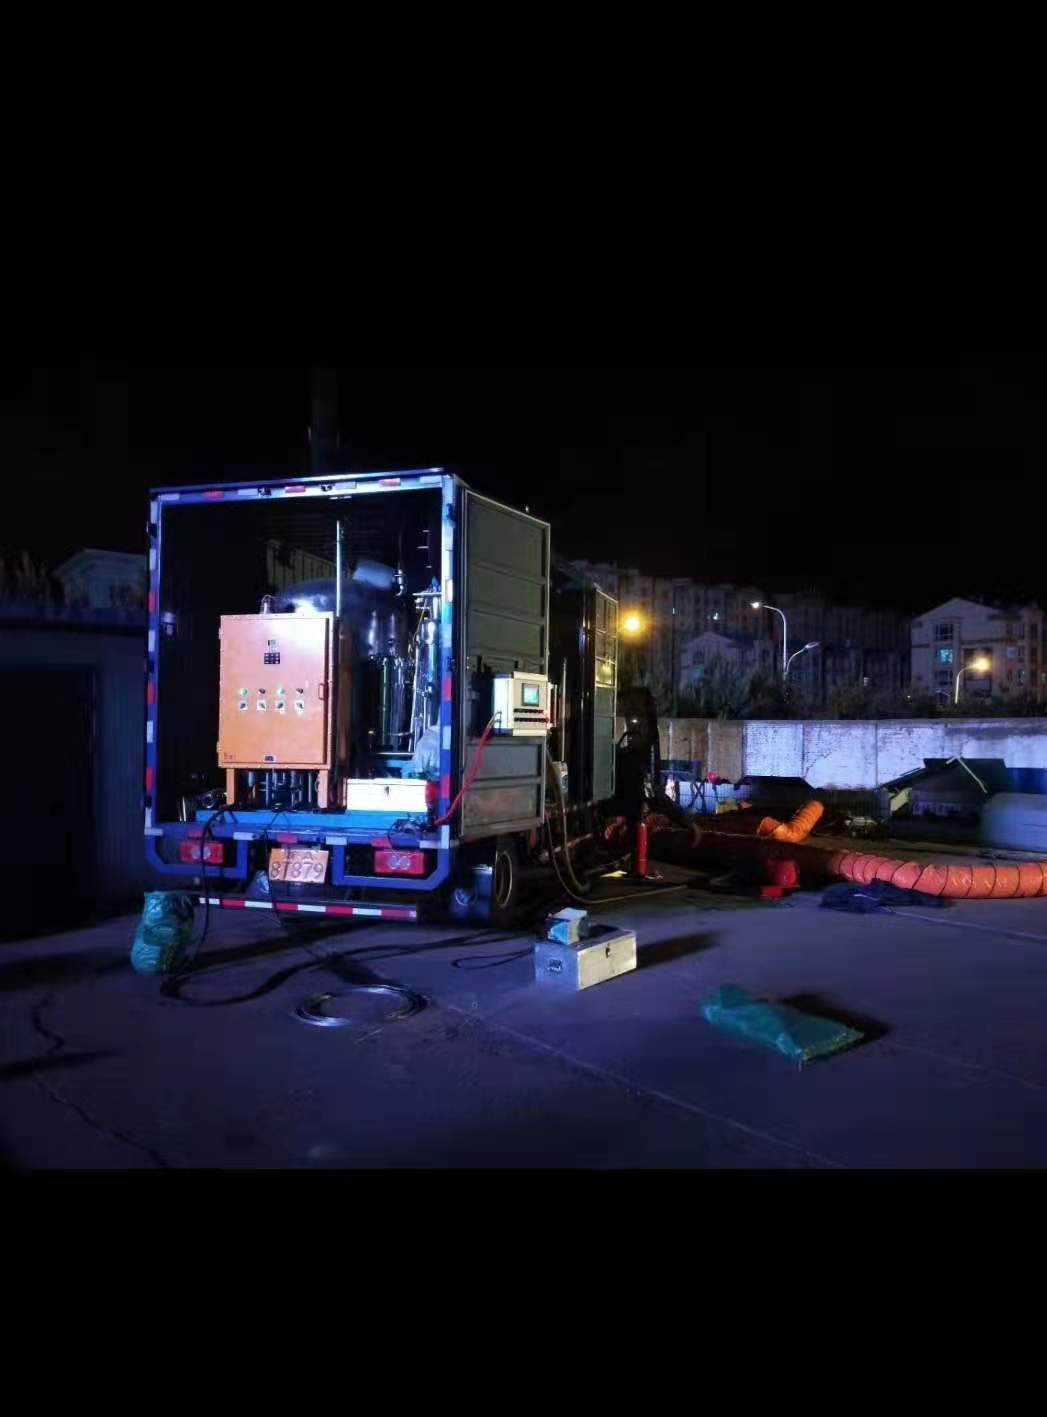
�ᳵ��ѭ���ã�����豸�ȳ�����ϴ�豸
��������������Ⱦ
�����̱���ϴ����
�ڻ�ѧ��ϴ����
Ϊ���������Ļ�����ҵ�����˾����ж�
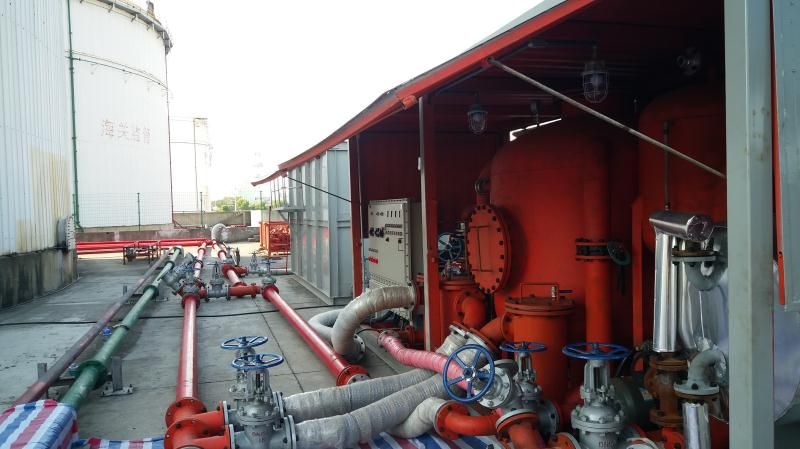
�����˸�ѹ����������ѹ��ϴ�豸
�����������ϴЧ����Ч��
������2012�꣬ע���ʽ�5100��Ԫ�����
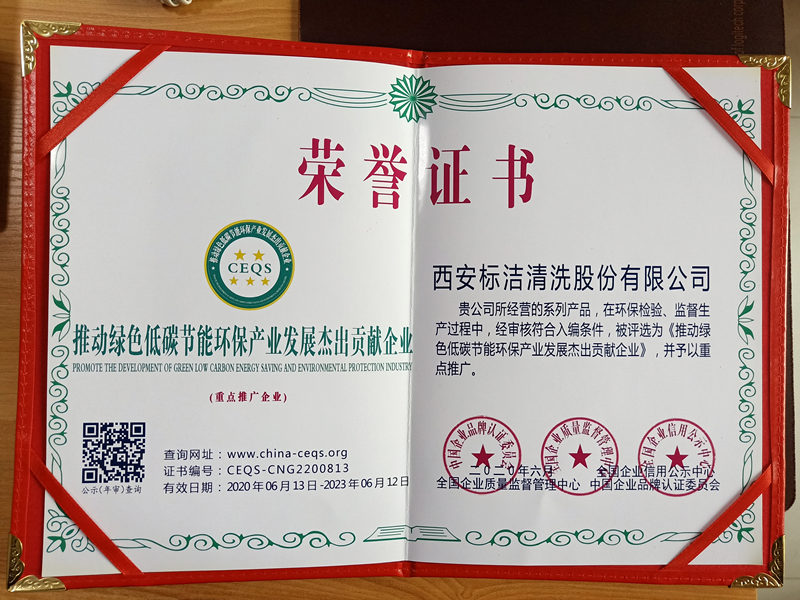
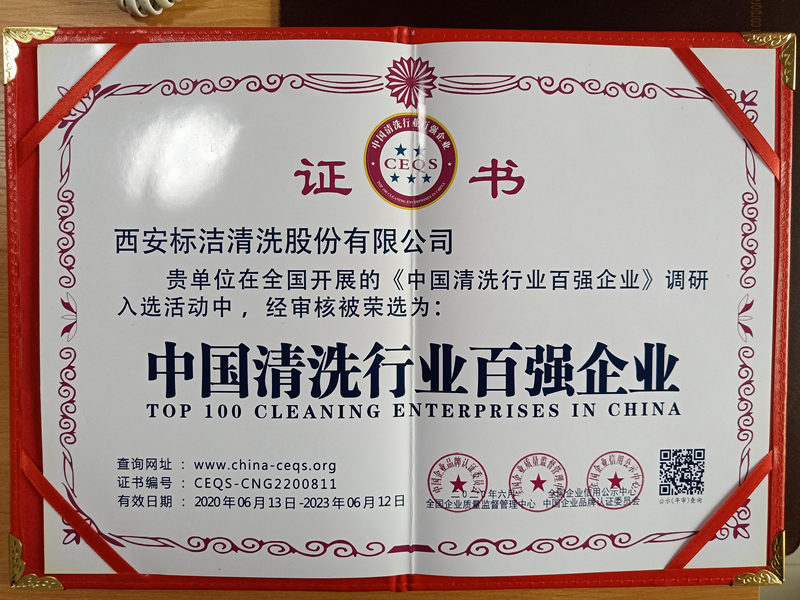
��ʮ����רע����ϴ��ҵ,��˾�������İ�������гɹ�
�й���ҵ��ϴЭ�᳣�����µ�λ
�й���ҵ��ϴЭ���Ա��λ
ӵ�л�ʴ����װ����ϴ�ܳа�һ�����ʡ���ѧ��ϴ�ܳа�һ������
��е��ϴ�ܳа�һ�����ʡ���������ϴһ���ʡ���
ҵ��Χ������ʽ����ϴ����ʽ����ϴ��������ϴ
���ܵ���ϴ���ܵ������豸��ϴ�����ӵ�����ҵ�塼ϴ����ҵ
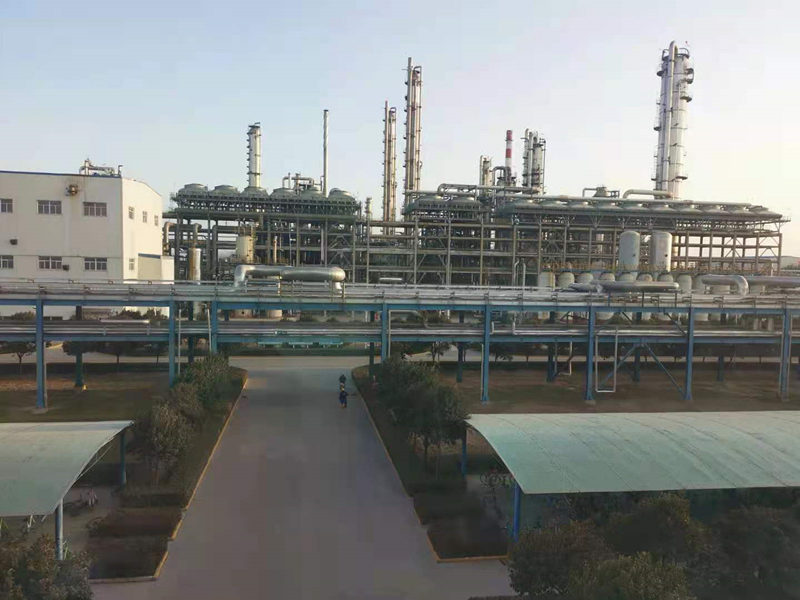
����Χ�㣬���������ͻ��IJ��컯����
���ӵ��һ֧רҵ��ϴ�����Ŷӣ�������Ա�����ϸ����ѵ����
��֤�����ϸڣ���ҵ����ḻ
��ʱ��Ӧ����ͻ��������⣬���ټҿͻ��ڱ���֤
��������������������Ĵ�����ϴ������һ���dz���Ҫ��������Ϊ��Щ������Ҫ����������ϴ����験��ά������..���������в����ϰ�ȫ������������������רҵ����ϴ���Ĺ�˾������Ҫ�ҵ�һ��ֵ�������Ĺ�˾...
��������������ϴ��˾����������ϴ��˾��һ��רҵ����ϴ��˾���ṩ..������ϴ���ù�˾ӵ�ж������ϴ�����һ֧רҵ����ϴ�Ŷӣ��ܹ�Ϊ�ͻ��ṩ����������ȫ�ɿ�����ϴ���ù�˾����ϴ����ʮ�־�ϸ������...
������ѹˮ������ϴ��ȫ��ҵ����1 ������ҵ1.1 ����ֻ�еõ���ǹ�����ߵ�ָ��ò����߲ſ�������ϴ�豸����ͼ5��ʾ���豸��ѹǰ���æء�������Ҫȷ�ϣ���ǹ�����ߴ��ڰ�ȫλ�ò��ѿ�����ͷ��������ԱҲ�Ѿ�λ��...
������֪����������Ҫ��ô��ϴô������С��һ���ɣ�����ϴ������4�֣�����ϴ��,ʪϴ��,����ϴ��,��ѧϴ������е����ϴĿǰ���ڴ�ͳ������ϴ������Ҫ�����˹����˹���������Ͷ�ǿ�ȴ�ʩ�����ڳ�����ȫ�Բ��Ⱦ�������Լ�ԭ�ͻ����ʵ͵����⡣�����ҹ�����ʯ�ʹ��Ĵ�������ͶԻ�������������������ӣ��˹�����Ѳ����ϻ�...
����
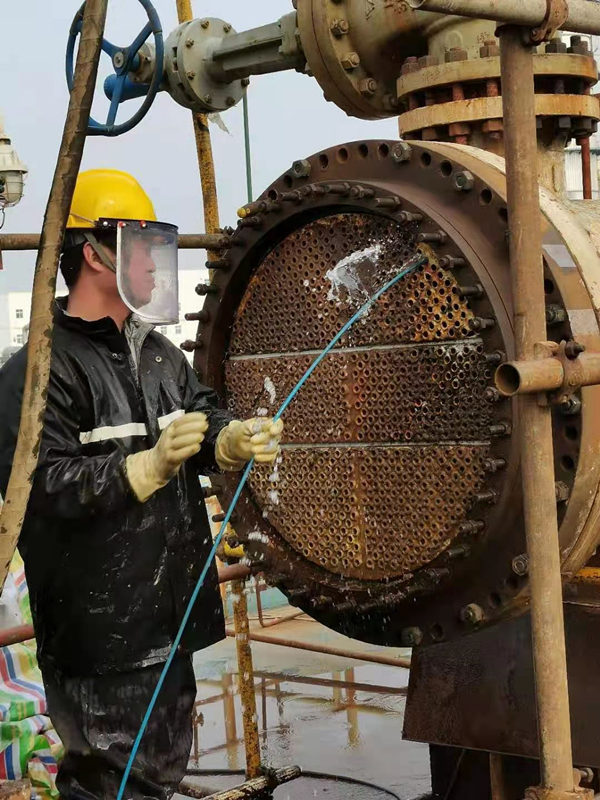
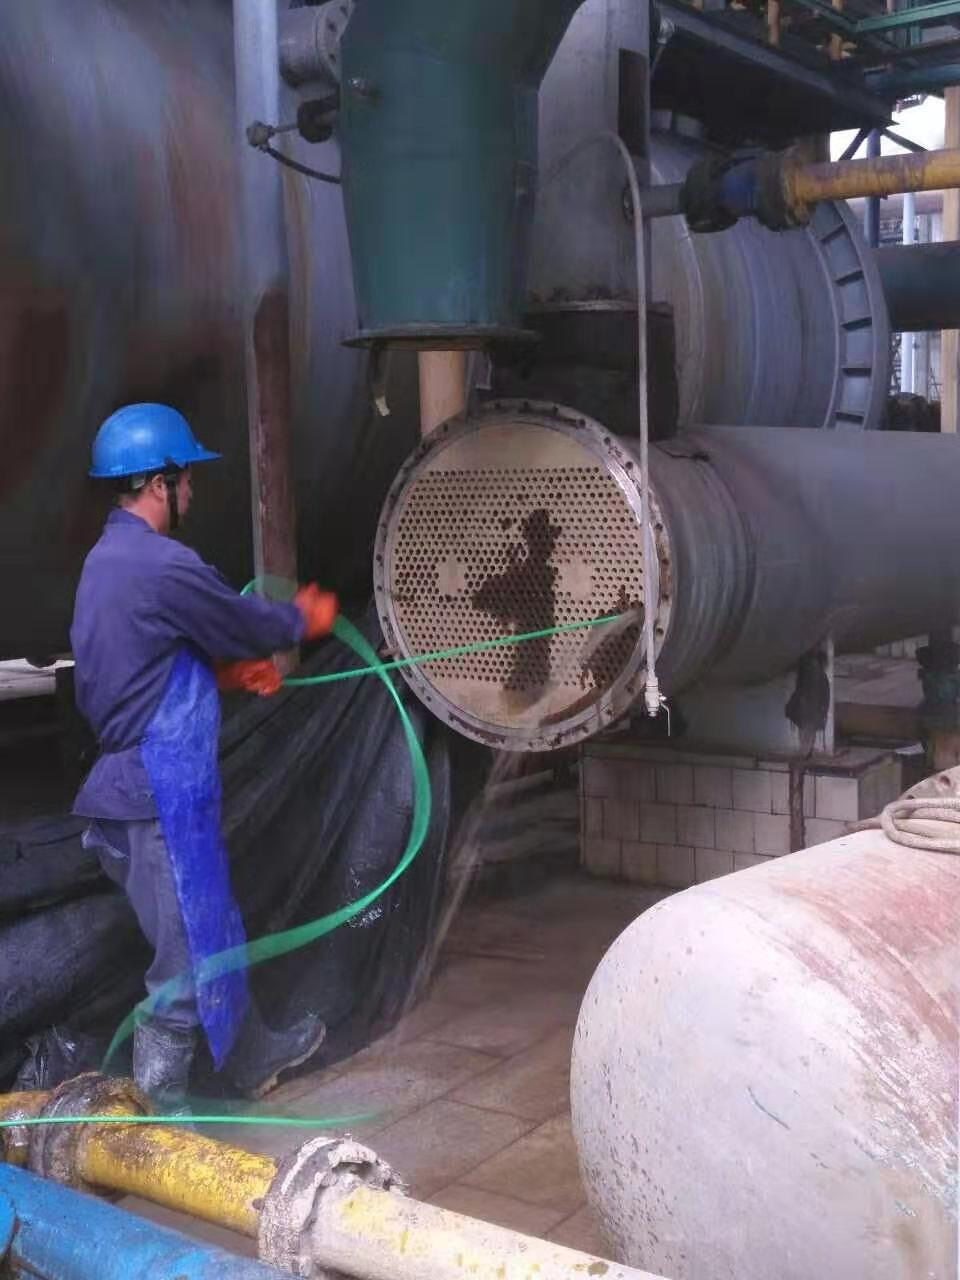
�ܵ���ϴ�൱��Ҫ���⨀�����Ŵ�Ҷ�֪������ô��ϴ�ܵ����õ���ϴ����������Щ�أ���������ѧ��ϴ��˾��С���������˽�һ�¡� �ܵ���ϴ���õ���ϴ�����л�ѧ��ϴ��������ϴ���֡��ܵ������ȷ�Ϲܵ�����ͨ���������Ҫ��ʵʩ��Ҫ���������ݣ�������ⱨ�档��Ҫʱ��Ҫѡ���ʵ��ܶο�����֤��ȷ���ܵ��ڼ��ľ��ȡ��ϸ��ʵ���...
������ѹ��ϴ������ԭ��:��ѹˮ������ϴ�����ǽ�����**�������һ��߿Ƽ���ϴ��������ҵ��ѹ��ϴ�����õĸ�ѹˮ������ϴ�����ǽ���ͨ����ˮͨ����ѹ������������ǧ������ѹ��Ȼ��ͨ�������죬�Լ��ߵ��ٶ���������߶ȼ��е�ˮ������ˮ�����Ժ�ǿ�ij�����ܣ����������ڱ���ϴ���棬�Ӷ�ʹ������룬�ﵽ��ϴĿ�ġ� ������ѹˮ������ϴ...
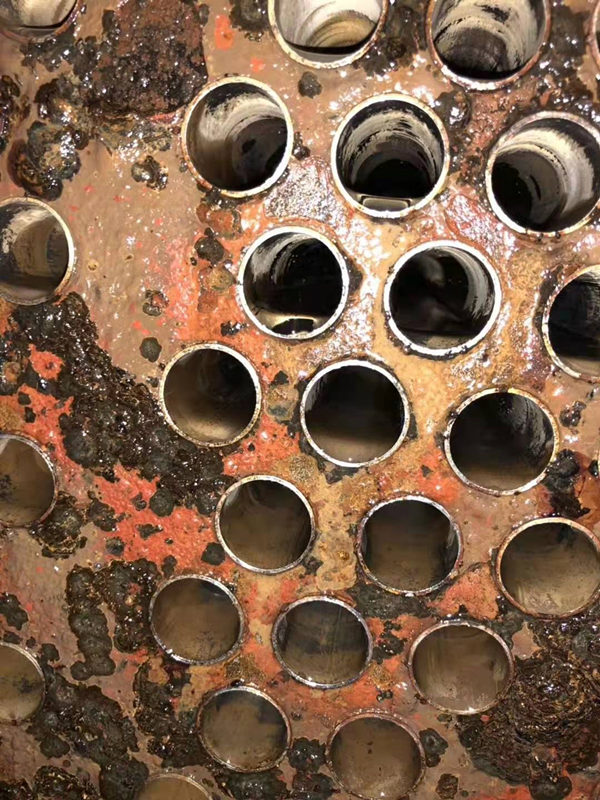
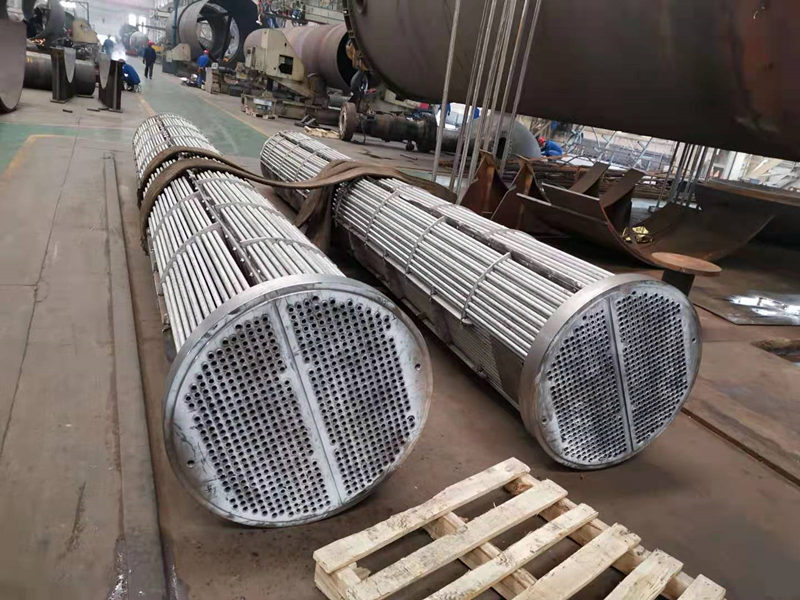
������¯��ˮ���ߵĻ�ѧ��ϴ��������˽���٣����棬��������ѧ��ϴ��˾��С�����ҷ���һ�¡� 1��ѧ��ϴ��Ŀ����Ϊ������ܵ��������е����⣬�Ṹ����֬������������Ⱦ��Ӷ���ֹ���豸��ɵ�����...
����������洦�����������ɰ����Ӧ�ù㷺������С����ܶ���ҵ�Ӵ����֣����洦��������ɰ������ʵ��Ӧ���д��ڼ������������棬��Ҹ������������������˾��С��һ�����˽�һ�¡� һ.ע�ز���ѡ�ã�...
����
���ڳ�ʱ������۹��������б�Ҫ�����������ϴ��������ϴ�I����ʱ���б�Ҫ���ر�����Ŀ��Ҫ����������������ɹ�˾��С����ϸΪ��ҽ��ܡ� ����ϴ��ҵ�����Ļ���Ҫ�� 1���ֳ���ҵ...
�������Ŵ�Ҷ�֪������ˮ�ܵ����ܸ�Ⱦ�Ƚ����صĵط������ڴ���ͨ�粻�������⣬�������������һЩ�к����壬�����������˺�����ˣ���������ϴ��ˮ�ܵ�ʱҪ�ر�ע�ⰲȫ�����棬��������ѧ��ϴ��˾��С��ʹ����...
�����ܵ�����ʴӦ����ô������������Ļ��������������������˾��С��һ��ͨ����������һ���˽�һ�°ɡ� ��ͬ�����������ϴԸֹܵĸ�ʴ�����ܴ�zuiС��ʴ��Ϊ0.004mm/a��zui��...
������ѹ��ϴ����ʹ������Ҫ�����ø�ѹ���ﵽ��ϴ��Ŀ�ģ�������ʵ��ʹ���У��ܶ��û��ᷢ����ϴЧ����û���������ô�ã���ʵ��Ͳ����������кܴ��ϵ�ģ�Ӱ�������Ч������Ҫ������������������ѹˮ������ϴ��˾��С...
����


һ�Ҿ��С�����ϴһ�����ʡ���������һ�����ʡ���ʵ����ҵ

��������